
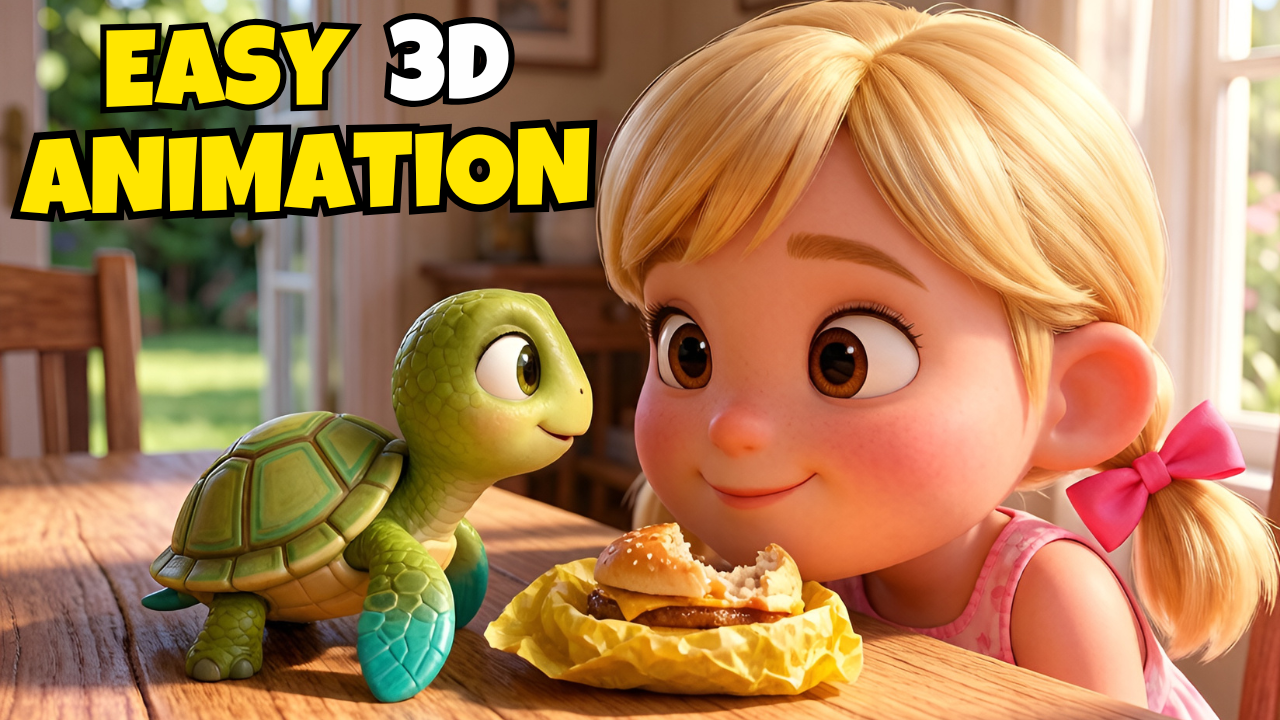
In the rapidly evolving landscape of digital content, AI-generated video has shifted from a novelty to a high-revenue industry. Today, independent creators, digital marketers, and storytellers are generating thousands of dollars per month by leveraging automated 3D Animation workflows.
Historically, producing Pixar-quality narrative videos required expensive rendering hardware, specialized software like Maya or Blender, and years of 3D modeling expertise. Today, platforms like Magiclight AI—powered by advanced generation models such as Seedance 2.5—have completely democratized the process.
This comprehensive guide breaks down the exact blueprint for building cinematic 3D Animation projects from total scratch without recording footage, buying hardware, or writing code.
What is Magiclight AI?
Magiclight AI is an end-to-end AI video creation ecosystem designed specifically for long-form narrative content, short dramas, and automated story generation. Unlike standalone image-to-video tools that suffer from spatial and character drift, Magiclight excels at cross-shot visual consistency.
Key Capabilities of Magiclight AI:
-
Long-Form Support: Capable of generating cohesive episodes up to 50 minutes in length.
-
Multi-LLM Script Generation: Integrates industry-leading Large Language Models (including Google Gemini) to auto-generate structured, shot-by-shot storyboards.
-
Character Asset Monetization: Allows creators to publish custom 3D characters to a public library, earning passive royalties whenever other users incorporate those assets into their projects.
-
Advanced Motion Engines: Features multi-model integration, including MiniMax H3 Fast for quick rendering and Seedance 2.5 for hyper-realistic visual physics.
Step 1: Conceptualization & Script Generation
Every high-performing 3D Animation relies on a structured visual script. Magiclight simplifies this phase by accepting high-level story concepts or full production scripts.
[Idea / Prompt] ➔ [Select Skill] ➔ [Select Script LLM] ➔ [Select Visual Style]
1. Generating the Core Idea
To build a compelling short drama, focus on high-emotion or high-stakes narratives. For instance, a narrative about a young child saving a sea turtle from a flock of seagulls provides immediate visual conflict and character interaction.
SEO Tip: You can leverage tools like Google Gemini or ChatGPT to outline emotional beats before importing them into Magiclight:
Prompt Example:
"Write a 12-scene emotional story arc about a young boy saving a baby sea turtle on a beach, suitable for a 3D animated short film."
2. Configuring Project Settings
Inside the Magiclight dashboard, input your prompt into the primary generation box and configure the base metadata:
-
Skill Selection: Choose Short Drama Video (or select alternative modes such as Kid Story Video, Explainer Video, or Story to Video depending on your niche).
-
Script Writing Model: Select the latest Gemini integration to ensure natural dialogue flow, proper scene pacing, and optimal emotional weight.
-
Visual Style: Select Pixar Animation to achieve vibrant lighting, appealing visual geometry, and cinematic depth-of-field.
-
Timing & Aspect Ratio: Choose your target platform’s aspect ratio (16:9 for YouTube/Widescreen, 9:16 for Shorts/TikTok) and set your duration. For initial test runs using free platform credits, keep the generated runtime under 60 seconds.
Once configured, hit Next. Magiclight automatically analyzes the concept and breaks it down into a sequence of discrete visual shots (e.g., 12 production-ready scenes).
Step 2: Character Creation and Asset Monetization
Maintaining visual consistency across multiple shots is the primary hurdle in 3D Animation. Magiclight solves this through dedicated character modeling profiles.
+-----------------------------------------------------------------------+
|                       CHARACTER CREATION WORKFLOW                     |
+-----------------------------------------------------------------------+
|  1. Define Persona  | Set character name, age, clothing, and tone.    |
|  2. Face Reference  | (Optional) Upload photo for exact facial match.|
|  3. Render Asset    | Generate base 3D model in Pixar style.          |
|  4. Save Profile    | Lock model parameters into the story ecosystem.|
+-----------------------------------------------------------------------+
How to Build Custom 3D Characters
-
Navigate to the Character Library. While you can select existing public models, building proprietary assets ensures unique branding.
-
Click Create and enter your character parameters:
-
Name: Assign a unique identifier (e.g., “Ethan – Beach Boy”).
-
Prompt Description: Specify exact physical attributes, age, clothing material, and artistic style.
-
Example:
3D Pixar style boy, 8 years old, wearing a blue summer t-shirt, beige shorts, expressive brown eyes, detailed hair texture, soft cinematic lighting.
-
-
Face Reference (Optional): Upload an existing character sheet to lock facial topology across frames.
-
-
Click Generate to finalize the model profile. Repeat this process for all key entities in your scene (e.g., the boy, the sea turtle, and secondary characters).
Building Passive Income via Asset Royalties
In traditional media pipelines, character assets represent sunk production costs. Within the Magiclight infrastructure, custom characters act as recurring digital assets.
When you publish a custom character to the public library:
-
Other platform users can license your character for their own 3D Animation projects.
-
Every time a third-party creator renders a scene using your asset, your account earns passive royalties.
-
Top creators track performance via the platform’s monthly Creator Leaderboard, creating an ongoing income stream separate from YouTube ad revenue.
Step 3: Storyboard Generation & Image Editing
With script parameters and character profiles locked in, Magiclight auto-generates custom high-resolution keyframes for every scene in your script.
[Script Breakdown] ➔ [Auto-Storyboard] ➔ [In-Suite Refinement] ➔ [Prompt Tweak]
Refining Keyframes in the Editing Suite
If an auto-generated shot exhibits minor defects or requires subtle adjustments, click the image frame to launch the integrated Editing Suite.
Key adjustments include:
-
In-Painting & Erasing: Remove unwanted background elements or artifacts.
-
Expression & Pose Adjustments: Modify character eye direction, mouth position, or body posture to align with the scene’s emotional context.
-
Outfit Swapping: Maintain temporal logic across environmental changes.
-
AI Chat Editing: Input natural language commands to modify specific lighting, camera angles, or background details directly.
-
Prompt Regeneration: If a keyframe deviates from the script’s intent, update the raw scene prompt in the right panel and click Regenerate.
Step 4: Animating Scenes with Seedance 2.5 and MiniMax H3
Once keyframe consistency is verified, static scenes must be converted into fluid motion clips.
Magiclight provides two main rendering pipelines for video generation:
| Feature / Metric | MiniMax H3 Fast | Seedance 2.5 |
| Primary Use Case | Rapid drafting, background motion | Hero shots, complex physics |
| Render Speed | Ultra-Fast | Standard / High-Detail |
| Physical Accuracy | Good | Hyper-Realistic Physics |
| Camera Mechanics | Fluid pan/zoom | Dynamic, rock-solid consistency |
| Credit Cost | Lower | Premium |
Why Choose Seedance 2.5 for Cinematic Physics?
For hero shots requiring physical realism—such as sea water splashing, sand movement, wind interaction with clothing, or dramatic facial expressions—Seedance 2.5 is the preferred engine.
-
Select the specific scene keyframe you wish to animate.
-
Open the model selection drawer and designate Seedance 2.5 as the primary video generator.
-
Review scene movement directions and camera vectors (pan, tilt, zoom).
-
Click Generate Video to render the motion clip.
Workflow Tip: To optimize credit consumption, use MiniMax H3 Fast for simple dialog scenes or static background shots, and reserve Seedance 2.5 for high-action scenes requiring precise physical dynamics.
Step 5: Post-Production, Audio, and Final Rendering
A compelling 3D Animation requires cohesive audio alignment, subtitles, and proper render settings before distribution.
[Video Clips] ➔ [Background Music / VO] ➔ [Subtitle Layer] ➔ [Export / Publish]
1. Subtitles & Audio Integration
Navigate to the post-production panel inside Magiclight:
-
Background Music (BGM): Browse the integrated royalty-free music library. Filter tracks by emotional tone (e.g., Inspirational, Dramatic, Upbeat) to match your story’s arc.
-
Subtitle Overlay: Enable auto-captions. Captions significantly increase watch time and viewer retention on platforms like YouTube Shorts and TikTok, where users often watch without sound.
2. Export Specifications
Select your final output resolution and aspect ratio based on your primary distribution channel:
-
Long-Form YouTube: 16:9 Aspect Ratio | 1080p or 4K Resolution.
-
YouTube Shorts / TikTok / Instagram Reels: 9:16 Aspect Ratio | 1080p Resolution.
Click Render Final Video. Once processing completes, download the MP4 file directly to your workstation or use Magiclight’s direct integration to publish directly to your linked YouTube channel.
Step 6: Monetization Strategy — From Content Creator to Digital Asset Owner
The ultimate goal of modern AI animation pipelines is establishing long-term leverage. Most creators stop after publishing their video to YouTube, missing a significant portion of their potential earnings.
Dual-Stream Revenue Model
                         +-----------------------------------+
                         |    3D ANIMATION REVENUE ENGINE    |
                         +-----------------------------------+
                                          |
                   +----------------------+----------------------+
                   |                                             |
                   v                                             v
     [STREAM 1: Content Distribution]             [STREAM 2: Digital Asset Royalty]
     • YouTube AdSense Revenue                    • Public Character Marketplace
     • YouTube Shopping / Affiliate               • Style Preset Licensing
     • Direct Brand Sponsorships                  • Continuous Passive Payouts
Stream 1: Content Monetization
-
YouTube AdSense & Shorts Fund: Long-form narrative 3D animations achieve high audience retention metrics, driving up RPM (Revenue Per Mille).
-
Affiliate & Sponsorships: Link production tools, prompt kits, or AI software in video descriptions.
Stream 2: Asset Royalty Network
-
Access your Magiclight Asset Library.
-
Locate the custom characters created during production (e.g., the boy, the turtle).
-
Toggle their status from Private to Public.
By setting your characters to public, you make them accessible to thousands of creators operating on the platform. Every time another user incorporates your custom character into their project, you earn automated royalties on their generation spend—turning every character you model into a digital worker generating recurring payouts.
Key Takeaways & Best Practices
To maximize performance and efficiency when building 3D Animation content using Magiclight and Seedance 2.5, keep these best practices in mind:
-
Leverage Free Tier Credits: Test script flow, aspect ratios, and character designs under 60 seconds to conserve initial credits while learning the UI.
-
Prioritize Character Consistency: Always define full character profiles before generating storyboards to prevent spatial morphing between scenes.
-
Use the Right Engine for the Job: Use Seedance 2.5 for high-stakes action shots requiring realistic physical dynamics, and lighter models for simple dialogue scenes.
-
Publish Your Assets: Always convert high-quality custom characters to Public to build an automated royalty portfolio over time.
By combining structured prompt engineering with advanced generation platforms like Magiclight and Seedance 2.5, anyone can build scalable, high-quality 3D Animation channels that drive both audience growth and passive digital revenue.
Create Stunning 3D Animation Videos with Magiclight AI
How to Create a Realistic AI Influencer with OpenArt
Octask AI Review 2026: Build Your Own AI Team to Create Videos Faster
